Two Awesome Projects with two awesome sisters
Guest Artists: Fiona Courneen, age 9 & Sloane Courneen, age 7
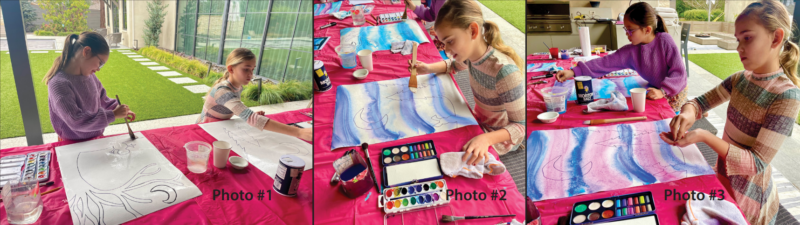
 These two sisters wanted to use two different media so we did both in one afternoon. Sloane worked with watercolor, salt and marker and Fiona tried pastel on black paper. The 2 media are different but fun for ages 6 and up.
Set up is important. We did these projects outside for easy clean up. Cover tables, have soft rags to mop up spills, dry hands, etc. With any art project, prep and set up is crucial to a happy experience.
Giving children media choices and options helps them decide where their strengths are. Working creatively develops emotional and intellectual intelligence and self expression. In this article you, as a parent, can decide with your child what media you want to do first, pick a theme and let the magic begin.
Pastel on black paper
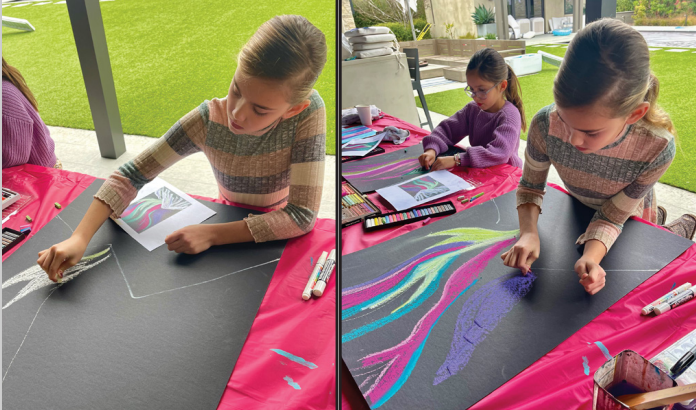 This project will definitely teach self control, pre-planning & decision making. I used to give my high school students black paper because they were so used to working with a dark line on light paper. This reverse can be challenging— light colors pop on the dark paper. You don’t have to fill in all areas with chalk—the black paper can become your outline or backdrop to your color. This is a more advanced thought process. On white paper black lines are the most powerful, on black paper the light color becomes dominant. This challenges the creative mind with different surfaces, media and approach.
You can buy pastel paper in soft tones as well as black. Pastel dries richer on colored paper and dries brilliant on black paper. Fiona’s theme is Northern Lights, but you can imagine this project done with a spring, summer, or fall theme. Sketch out an idea first on another paper. Referring to your sketch, outline on the black paper using a soft dark pencil or a light opaque marker. Leave areas of the black paper showing. Do not use black pastel until the very end. Start with white or your lightest colors. Leave areas off the background empty— just the black paper showing will provide a beautiful rich background. Do not rub the pastel into the paper—leave it and if you want the color more intense, add a light or dark of the same color. If powder from the chalk/pastel accumulates, take the paper to a garbage can and shake into the garbage.
When finished, clean up dusty areas with damp cloth and to set pastel you can mist lightly with an aerosol inexpensive hair spray or buy a professional fixative. Do not get the pastel wet.
Watercolor Silhouette Art Using salt
There is nothing more exciting than children watching brilliant colors mix together before their eyes and having the freedom to use different media to create a masterpiece.
 The journey of discovery is the best part. This project can be adapted for any season. (See additional examples of palm trees and sunset.) Sloane picked this mixed media project which teaches pre- planning, critical thinking, color mixing, and science. Throughout the process engage your child verbally. Ask your child what happens when the wet paint is brushed into the wet paper? What colors are made when they flow together? What happens to the color when salt is sprinkled on the wet color? Say “Look how the salt absorbs the water, taking the color into the salt leaving a speckled pattern.” Here the girls sprinkled the salt into the sky when the color was wet. In the sunset painting, the sand effect was created by sprinkling salt into wet brownish paint. Praise your child at every step. Your children are excited—so be excited along with them.
The girls sketched the outline of the silhouette on the white watercolor paper first. You can also make a paper pattern and trace around it on the water color paper.